Painting golf balls, as it pertains to your query on “How To Paint Golf Balls?” involves the creative process of applying various colors and designs to golf balls. This technique allows golfers to personalize their golf balls or enhance their visibility on the course.
How To Paint Golf Balls? If you’re looking to add a personal touch to your golf equipment or simply want to make your golf balls stand out, learning how to paint golf balls can be a fun and rewarding experience. Whether you want to create unique designs, identify your balls easily, or simply have some artistic fun, painting golf balls opens up a world of possibilities.
Painting golf balls offers golfers the chance to express their individuality on the golf course. Many golfers choose to add their own designs, initials, or distinctive patterns to their golf balls. Painting golf balls can serve a practical purpose by making it easier to identify your ball in a group or during a game.
Materials You’ll Need
Before you begin painting golf balls, it’s essential to gather the necessary materials and prepare your workspace. Here is a list of materials you’ll need:
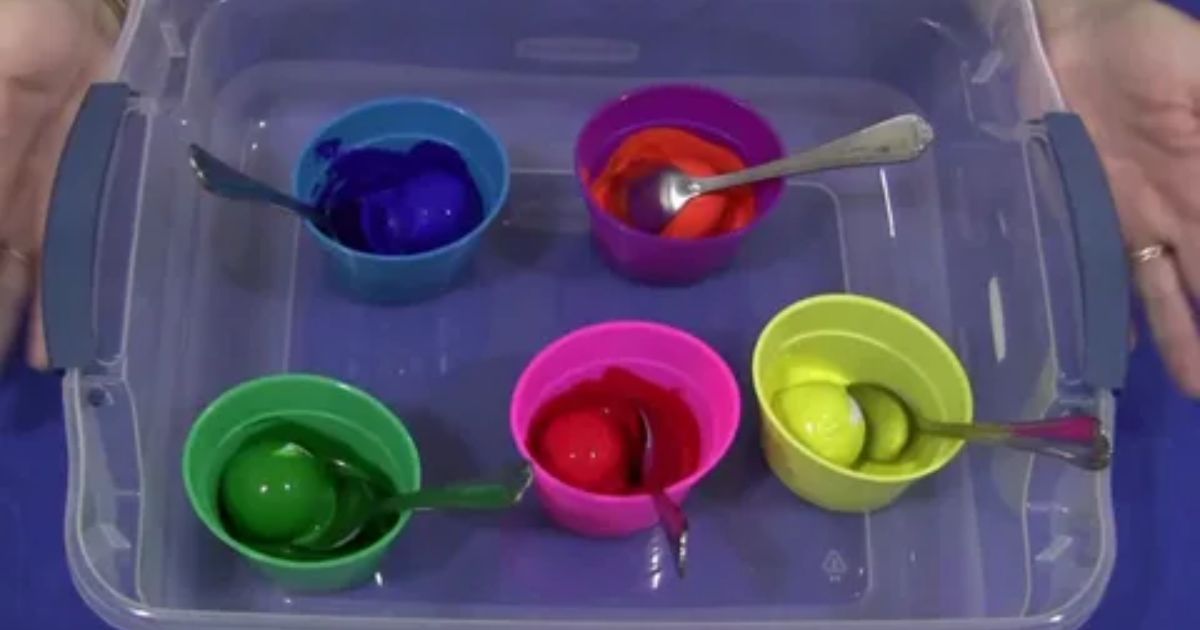
Paints and Brushes
To paint golf balls, you’ll require acrylic paints in various colors. It’s advisable to use high-quality acrylic paints that adhere well to the surface of the golf ball. Additionally, have a set of fine paintbrushes with different brush sizes for detailed work.
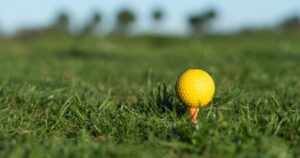
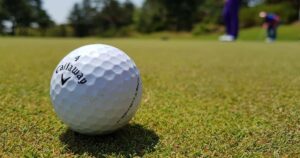
Golf Balls
Select the golf balls you want to paint, ensuring they are clean and free of any dirt or debris. It’s a good idea to use new or slightly used golf balls, as they provide a smoother and more even surface for painting. If your golf balls are dirty, you can wash golf balls thoroughly and dry them before starting the painting process. You can choose standard white golf balls or colored ones, depending on your preference.
Paint Palette
A paint palette is essential for mixing and holding your paint colors. It allows you to work with various shades and keep them organized during the painting process.
Paint Thinner and Water
Paint thinner and water are used for diluting and adjusting the consistency of your acrylic paints. These help you achieve different effects, from opaque to translucent colors.
Painter’s Tape
Painter’s tape is useful for masking areas of the golf ball that you don’t want to paint. It helps you create clean lines and prevent paint from spreading where it’s not intended.
Sealer
After painting the golf balls, you’ll need a clear sealer to protect the paint and ensure it doesn’t chip or peel off easily. Look for a sealer specifically designed for use on golf balls.
Newspaper or Drop Cloth
Cover your workspace with newspaper or a drop cloth to protect it from paint spills and splatters. This makes cleanup easier and keeps your work area tidy.
Step-by-Step Guide to Painting Golf Balls
Painting golf balls can be a fun and rewarding activity. To get started, follow these steps. Consider using stencils or freehand painting, depending on your artistic abilities. If you’re painting multiple golf balls, you can create a theme or variation in your designs.
Prepare Your Workspace
Lay out your newspaper or drop cloth to create a clean and organized workspace. Make sure you have good lighting and ventilation to work comfortably. Gather all your materials and have them within easy reach. This will help you stay organized and prevent interruptions while painting.
Clean the Golf Balls
Before painting, clean the golf balls thoroughly. Use a damp cloth or sponge to remove any dirt or residue, as this can affect the paint’s adhesion. Dry the golf balls completely before proceeding to the next step.
Apply Painter’s Tape (Optional)
If you have a specific design in mind or want to create clean lines, apply painter’s tape to mask off areas that you don’t want to paint. This step is optional but can enhance the precision of your artwork.
Choose Your Design and Colors
Plan your design and select the colors you’ll use for each part of the golf ball. Consider using stencils or freehand painting, depending on your artistic abilities. If you’re painting multiple golf balls, you can create a theme or variation in your designs.
Start Painting
Dip your paintbrush into the chosen color and begin applying paint to the golf ball. Start with lighter colors first and allow them to dry before adding darker shades. Be patient and work with thin layers of paint to avoid smudging or uneven coverage. Allow each layer to dry before adding additional coats.
Add Details and Patterns
Once the base color is dry, add details and patterns to your golf ball. This is where your creativity can shine. Experiment with different techniques to achieve the desired effect. If you’re using stencils, make sure they are secured in place to avoid smudging.
Allow to Dry
After completing your design, allow the golf balls to dry thoroughly. This may take a few hours, depending on the thickness of the paint layers. Avoid touching or handling the golf balls during the drying process to prevent smudging or damage to the paint.
Apply a Sealer
Once the paint is completely dry, apply a clear sealer to protect your artwork. Follow the manufacturer’s instructions for the sealer, and ensure even coverage. Allow the sealer to dry as recommended before using the golf balls.
Remove Painter’s Tape (If Applied)
If you used painter’s tape to mask off areas, carefully remove it to reveal clean lines and edges in your design. Your painted golf balls are now ready for use. Whether you painted them for personal enjoyment, as gifts, or for promotional purposes, they add a unique and personalized touch to your game.
Tips for Painting Golf Balls

Achieving the best results when painting golf balls requires some skill and know-how. Here are some helpful tips to enhance your painting experience. If you used painter’s tape to mask off areas, carefully remove it to reveal clean lines and edges in your design.
Practice on Spare Golf Balls
Before painting your favorite golf balls, practice on spare or used balls. This will help you get comfortable with the painting process and develop your technique. Before using your painted golf balls on a golf course, check with the course’s rules and regulations. Some courses may have restrictions on the use of custom-painted golf balls.
Keep Your Hands Clean
Clean hands are essential to prevent unwanted smudges on your golf balls. Wash your hands frequently, and consider using disposable gloves to keep the surface clean. If you create striking designs, consider sharing them with friends or on social media. It can be a fun way to showcase your artistic talents and potentially inspire others to try golf ball painting.
Use a Steady Hand
Painting intricate designs on a small surface like a golf ball requires a steady hand. Take your time, and if necessary, rest your hand on a stable surface to maintain control. Consider customizing your golf balls with personal initials, team logos, or unique designs. This can be a great way to showcase your individual style on the golf course.
Experiment with Brushes
Different brushes can create different effects. Experiment with a variety of brush sizes and types to achieve the desired details and textures in your artwork. Cover your workspace with newspaper or a drop cloth to make cleanup easier. It also prevents paint from accidentally spreading to other surfaces.
Plan Your Design
Plan your design in advance. You can sketch it out on paper or create a digital mock-up to visualize the final result. This planning will help you stay organized and focused. Allow each layer of paint to dry completely before adding additional coats. Rushing this step can result in smudged or uneven paint.
FAQ’s
Is it safe to paint golf balls, and will it affect their performance?
Painting golf balls is safe, but it can have a minimal impact on their performance. The added weight of the paint may slightly affect the ball’s flight characteristics.
What type of paint should I use for painting golf balls?
Acrylic paints are the most suitable type of paint for golf ball painting. They adhere well to the ball’s surface and provide vibrant, long-lasting colors.
Can I paint overused golf balls, or should I use new ones?
You can paint over used golf balls as long as you clean them thoroughly. However, using new or slightly used golf balls is recommended, as they provide a smoother and more even surface for painting. The condition of the golf ball’s surface can impact the quality of your artwork.
Do I need artistic skills to paint golf balls?
Artistic skills are not necessary to paint golf balls. You can create simple designs or use stencils for more intricate patterns. Practice and experimentation will help you improve your painting technique over time.
How long does it take for the painted golf balls to dry completely?
The drying time for painted golf balls varies depending on the thickness of the paint layers and environmental conditions. It takes a few hours for the paint to dry completely. Avoid handling the balls during this time to prevent smudging.
Conclusion
Painting golf balls is a creative and enjoyable way to add a personal touch to your golf game. Whether you’re looking to stand out on the course or create unique gifts for fellow golf enthusiasts, this DIY project offers endless possibilities.
With the right materials, preparation, and a bit of artistic flair, you can transform ordinary golf balls into works of art that reflect your style and personality. So, grab your paints and brushes, and start your golf ball painting journey today.